> ## Documentation Index
> Fetch the complete documentation index at: https://docs.callrounded.com/llms.txt
> Use this file to discover all available pages before exploring further.
# Launch a call campaign
### 1. Declare variables
Declare the variables associated with the data in your CSV file in the [**Custom Variables**](/documentation/build/variables/getting-started-with-variables#custom-variables) section, then define them in the [**Call Context**](/documentation/build/variables/getting-started-with-variables#step-2-variable-initialization-block-call-context) section.
***
### 2. Navigate to the Campaigns section
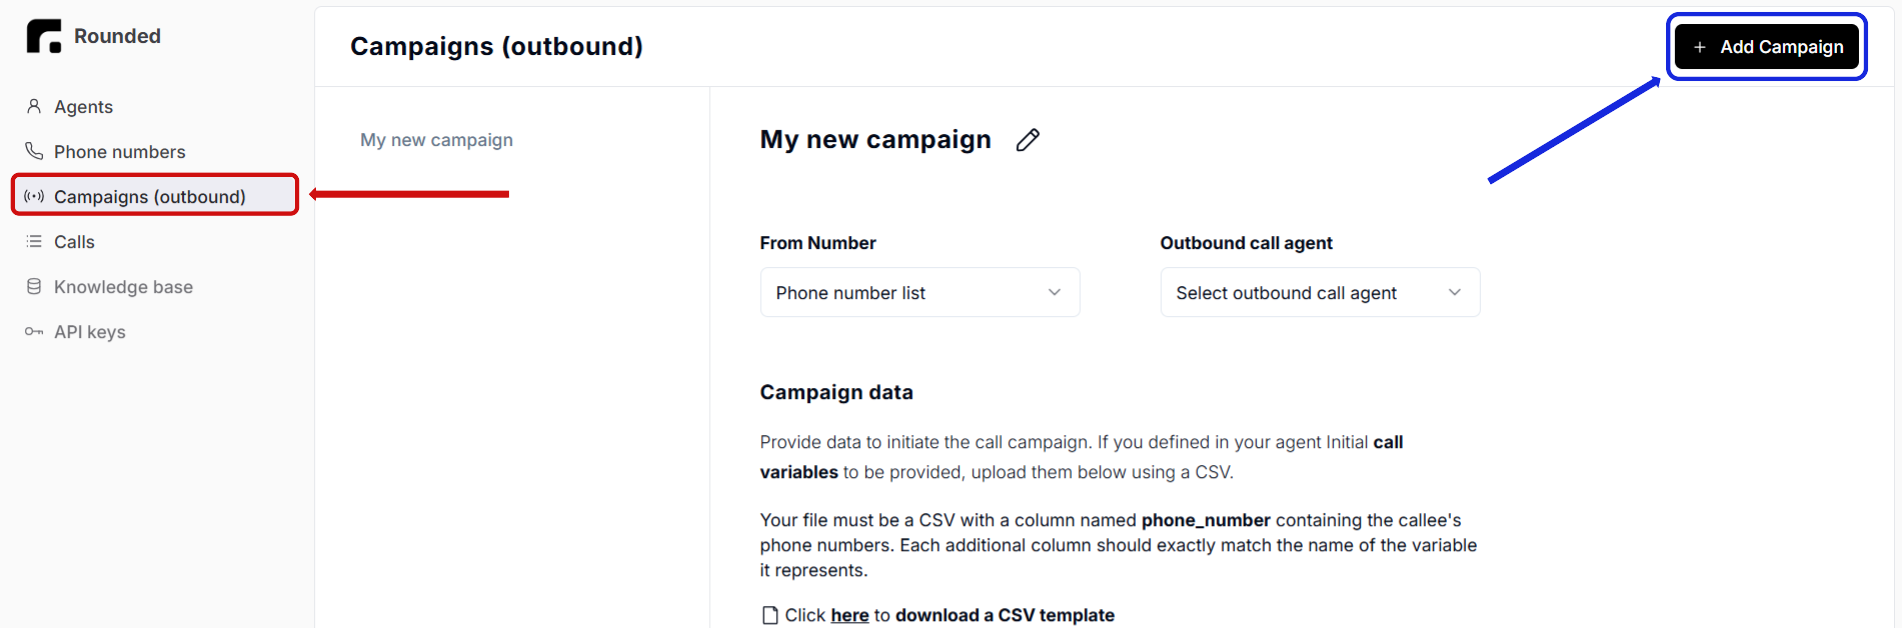
* First, go to the **"Campaigns (outbound)"** section (highlighted in red in the screenshot below).
* Then, click on the **"Add Campaign"** black button (highlighted in blue).
 ***
### 3. Associate a phone number and agent
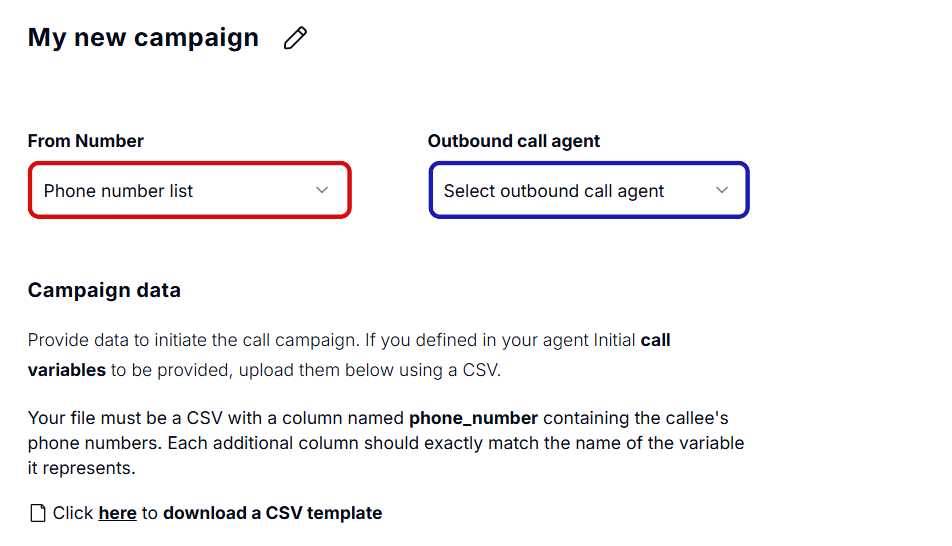
* Assign a phone number to the campaign (highlighted in red below). If you don’t have a phone number yet, refer to the [**Associate your agent with a phone number**](/documentation/getting_started/build_your_first#associate-your-agent-with-a-phone-number) section.
* Link the correct agent to the campaign (highlighted in blue).
***
### 3. Associate a phone number and agent
* Assign a phone number to the campaign (highlighted in red below). If you don’t have a phone number yet, refer to the [**Associate your agent with a phone number**](/documentation/getting_started/build_your_first#associate-your-agent-with-a-phone-number) section.
* Link the correct agent to the campaign (highlighted in blue).
 ***
### 4. Upload the CSV file
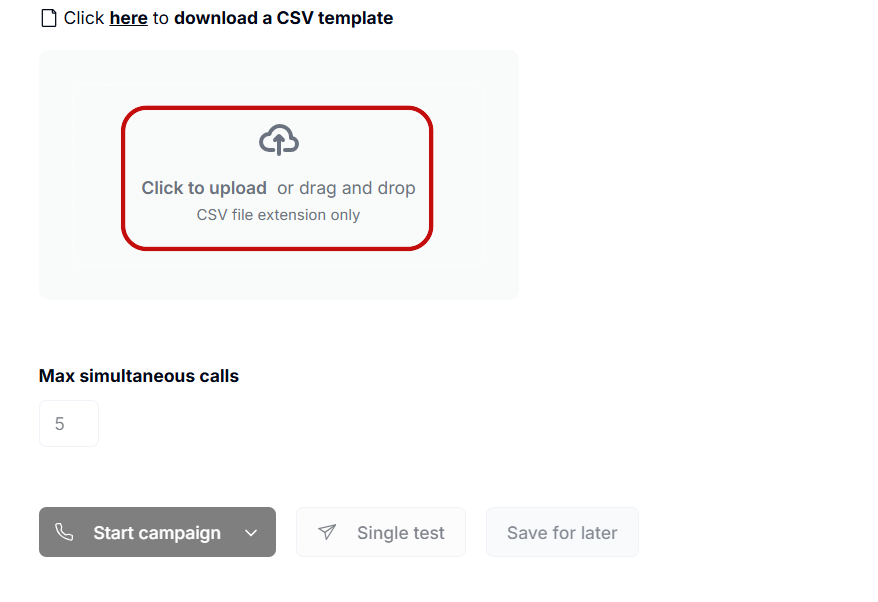
Upload your CSV to the block highlighted in red below. The file must include:
* A column named **`phone_number`** with the numbers to call.
* Columns with the exact names of the variables declared in Step 1, with appropriate values.
Use this [**CSV template**](https://rounded-studio-dev.vercel.app/files/campaign_data_example.csv) as a reference.
***
### 4. Upload the CSV file
Upload your CSV to the block highlighted in red below. The file must include:
* A column named **`phone_number`** with the numbers to call.
* Columns with the exact names of the variables declared in Step 1, with appropriate values.
Use this [**CSV template**](https://rounded-studio-dev.vercel.app/files/campaign_data_example.csv) as a reference.
 ***
### 5. Start the campaign
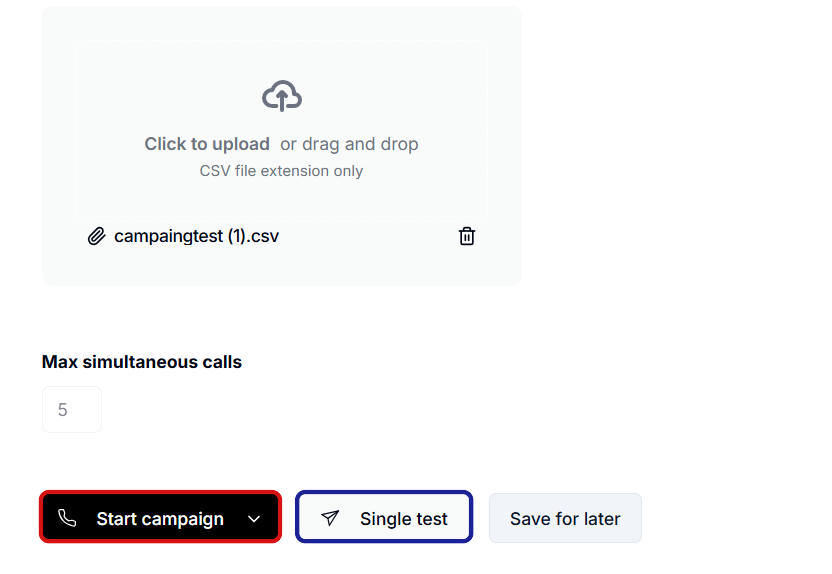
To test your agent with a single number:
* Click on **"Single test"** (highlighted in blue below).
* Fill in the variables manually.
To launch the full call campaign:
* Click on the **"Start campaign"** button (highlighted in red below).
***
### 5. Start the campaign
To test your agent with a single number:
* Click on **"Single test"** (highlighted in blue below).
* Fill in the variables manually.
To launch the full call campaign:
* Click on the **"Start campaign"** button (highlighted in red below).
 ***
Calls will be processed one at a time.\
For simultaneous calls, please contact: **[team@callrounded.com](mailto:team@callrounded.com)**
***
Calls will be processed one at a time.\
For simultaneous calls, please contact: **[team@callrounded.com](mailto:team@callrounded.com)**