> ## Documentation Index
> Fetch the complete documentation index at: https://docs.callrounded.com/llms.txt
> Use this file to discover all available pages before exploring further.
# 5. Integrations
Rounded allows you to connect more than **1,500 applications** via **Pipedream** to enrich your voice agents: calendars, CRMs, messaging platforms, internal tools, and much more.
This guide explains, step-by-step, how to:
* Connect your accounts
* Add integrations to a task
* Configure all fields
* Write clear instructions for the agent
***
## 1. Connecting an Integration
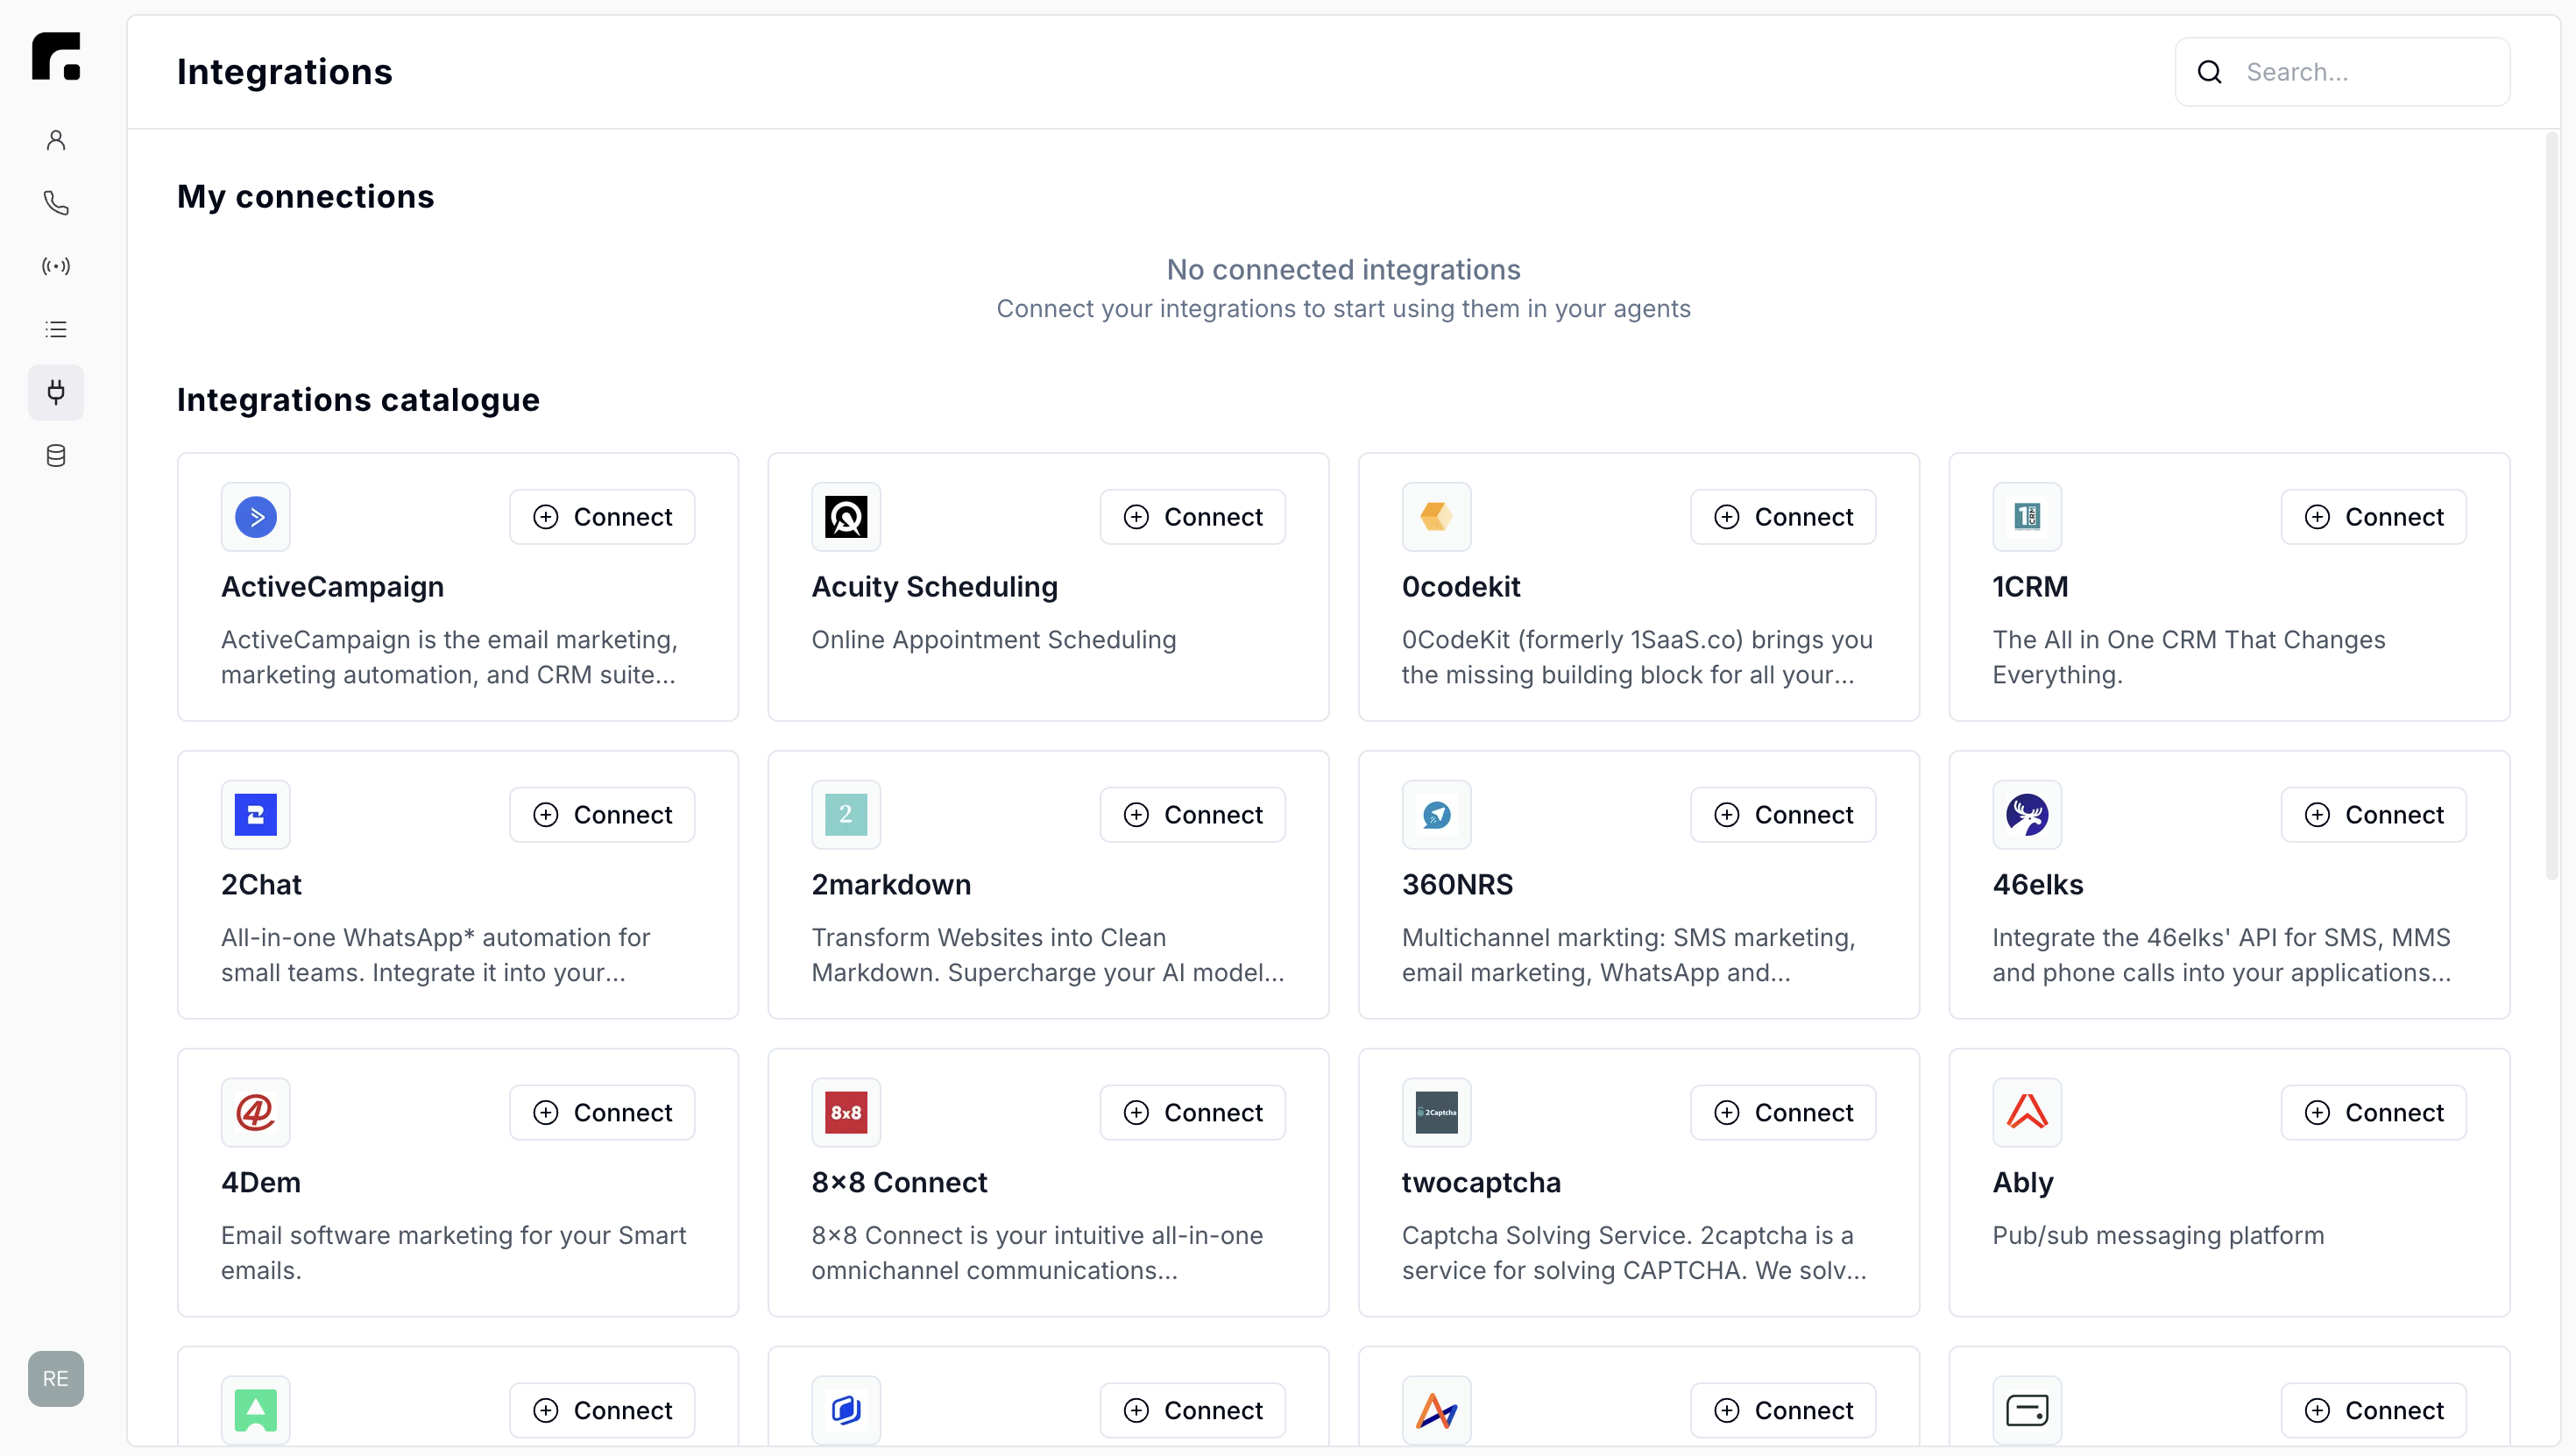
Before you can use an integration in an agent, you must first connect your account. One way is to do it in the dedicated **Integrations** page.
### Steps
1. Click the **Integrations** tab in the left-hand menu.
2. Search for the application you want (e.g. **Gmail**, **Slack**, **Telegram**).
3. Click **Connect** on the application card.
 ***
## 2. Authorising via Pipedream
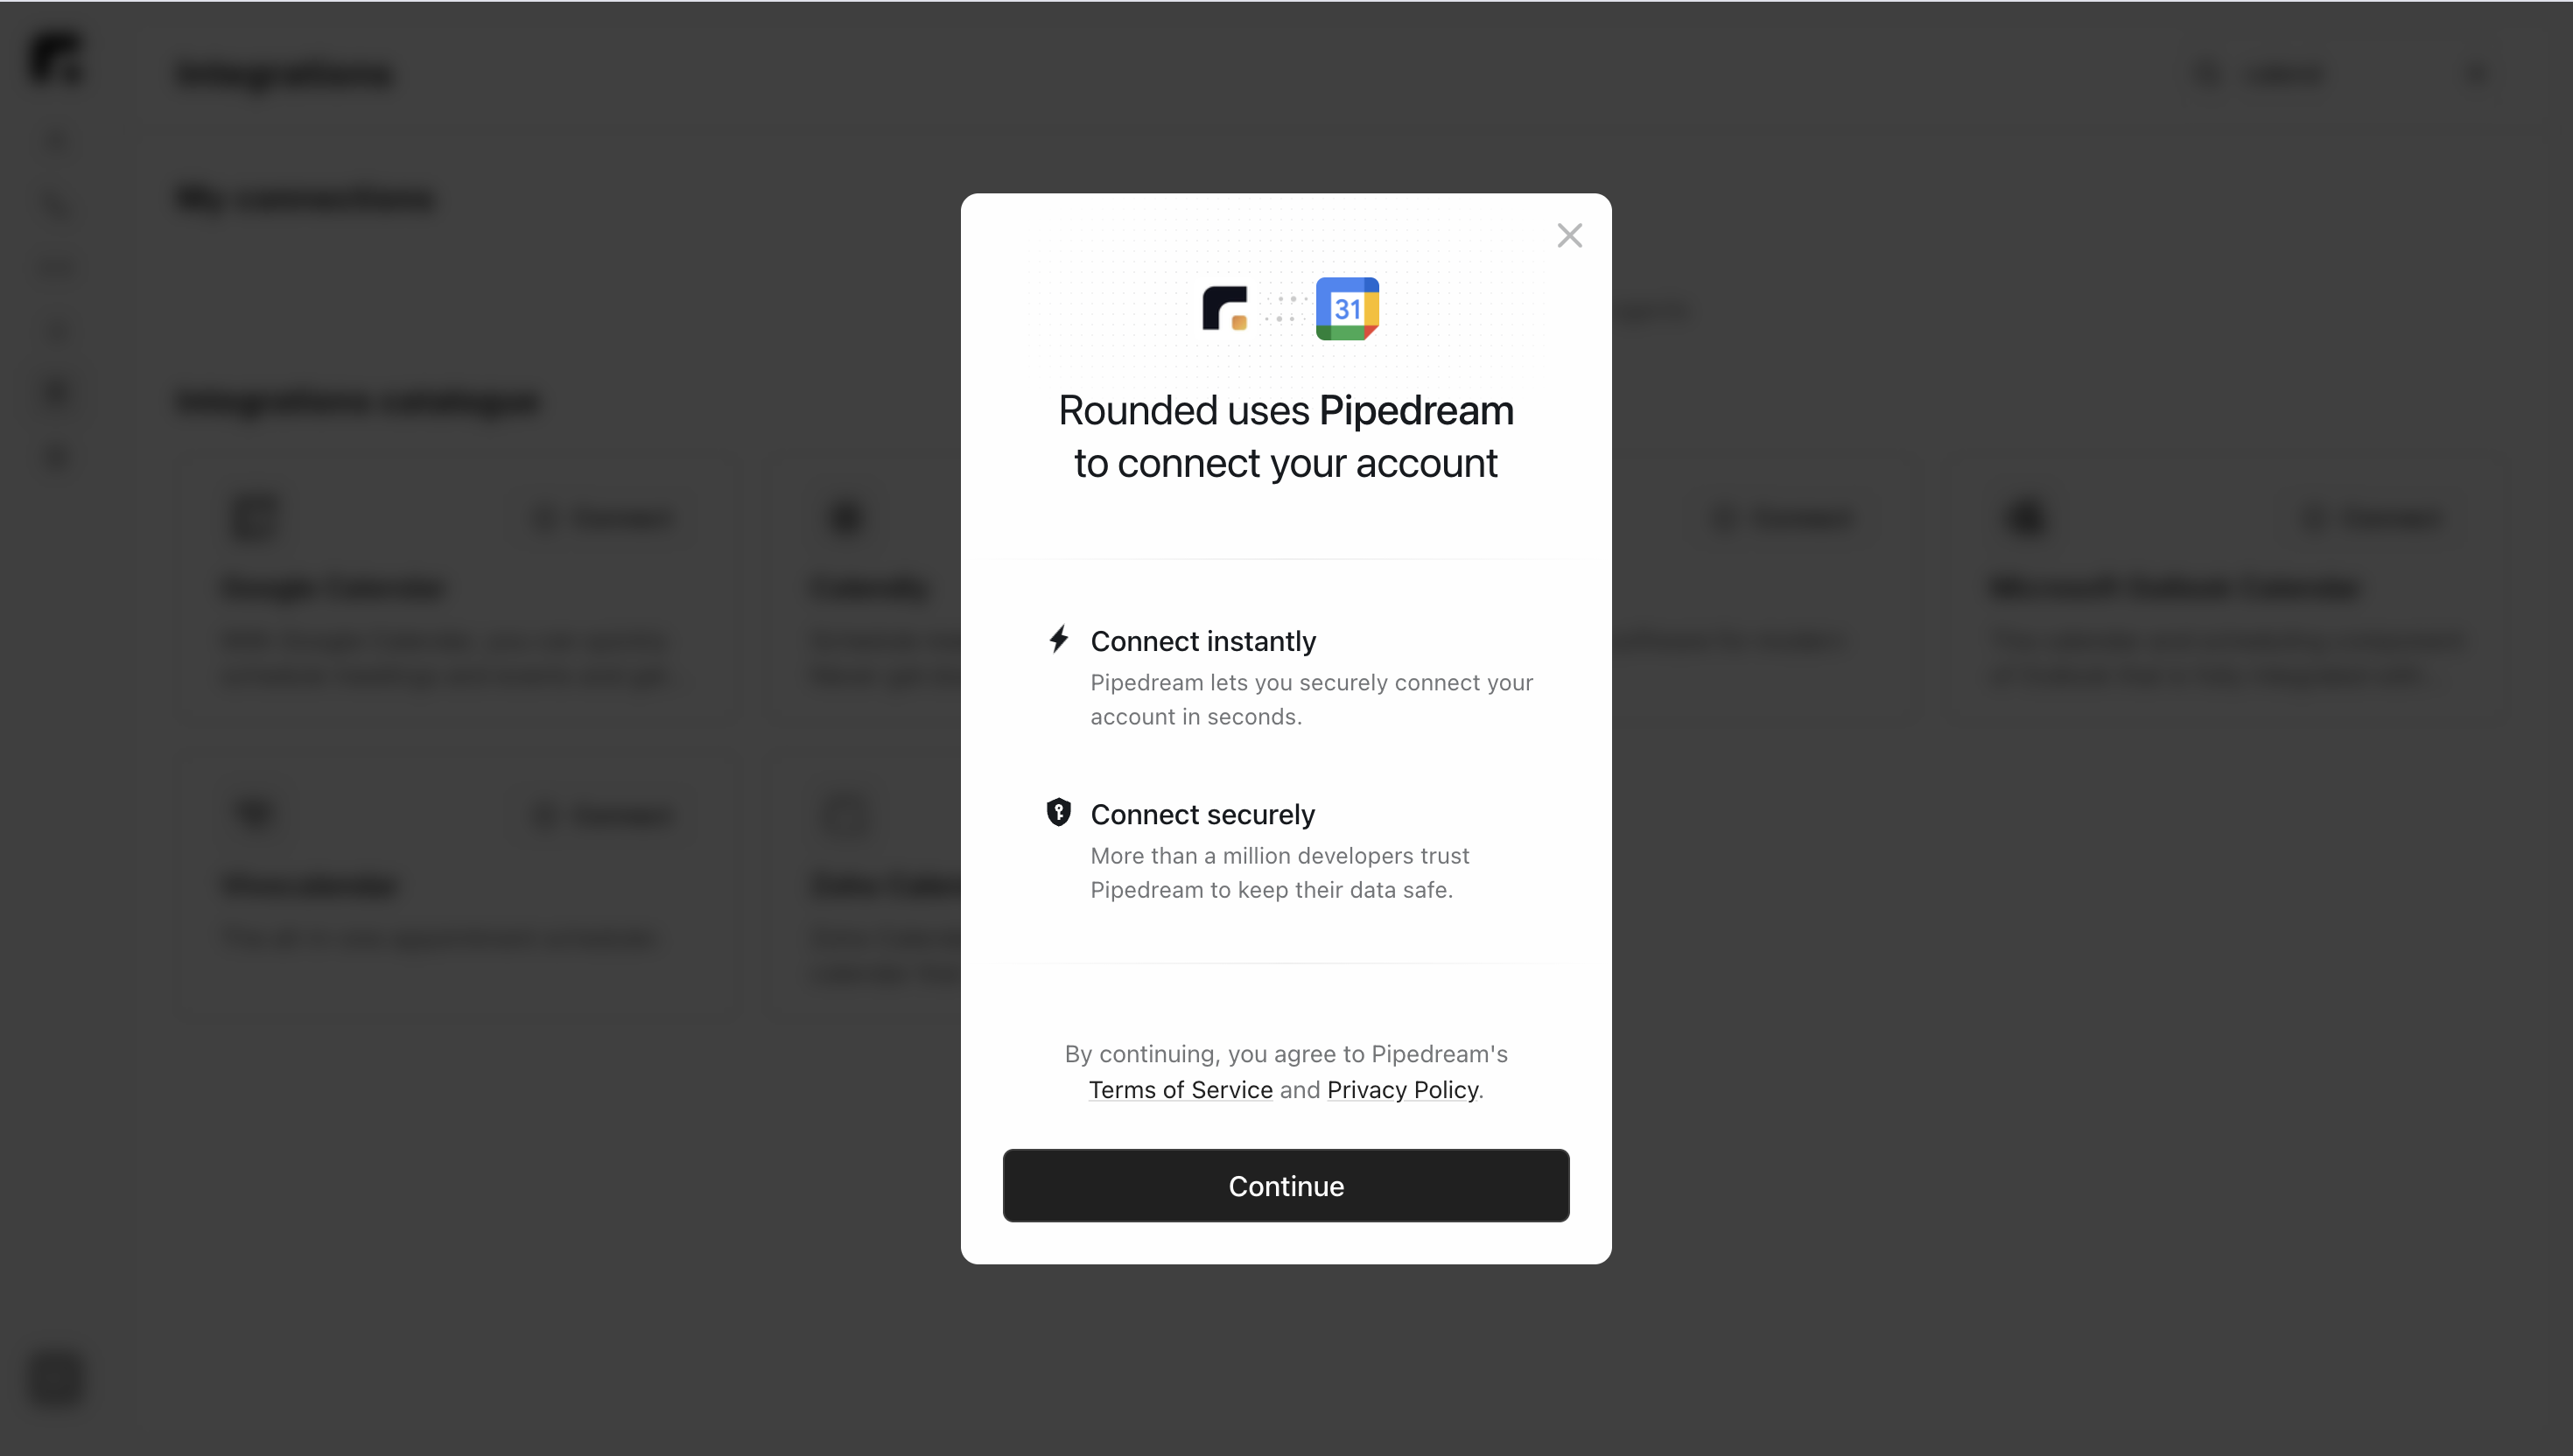
A pop-up window opens to securely authorise access to your third-party account.
### Steps
* Click **Continue**.
* Log in to the external service and authorise access.
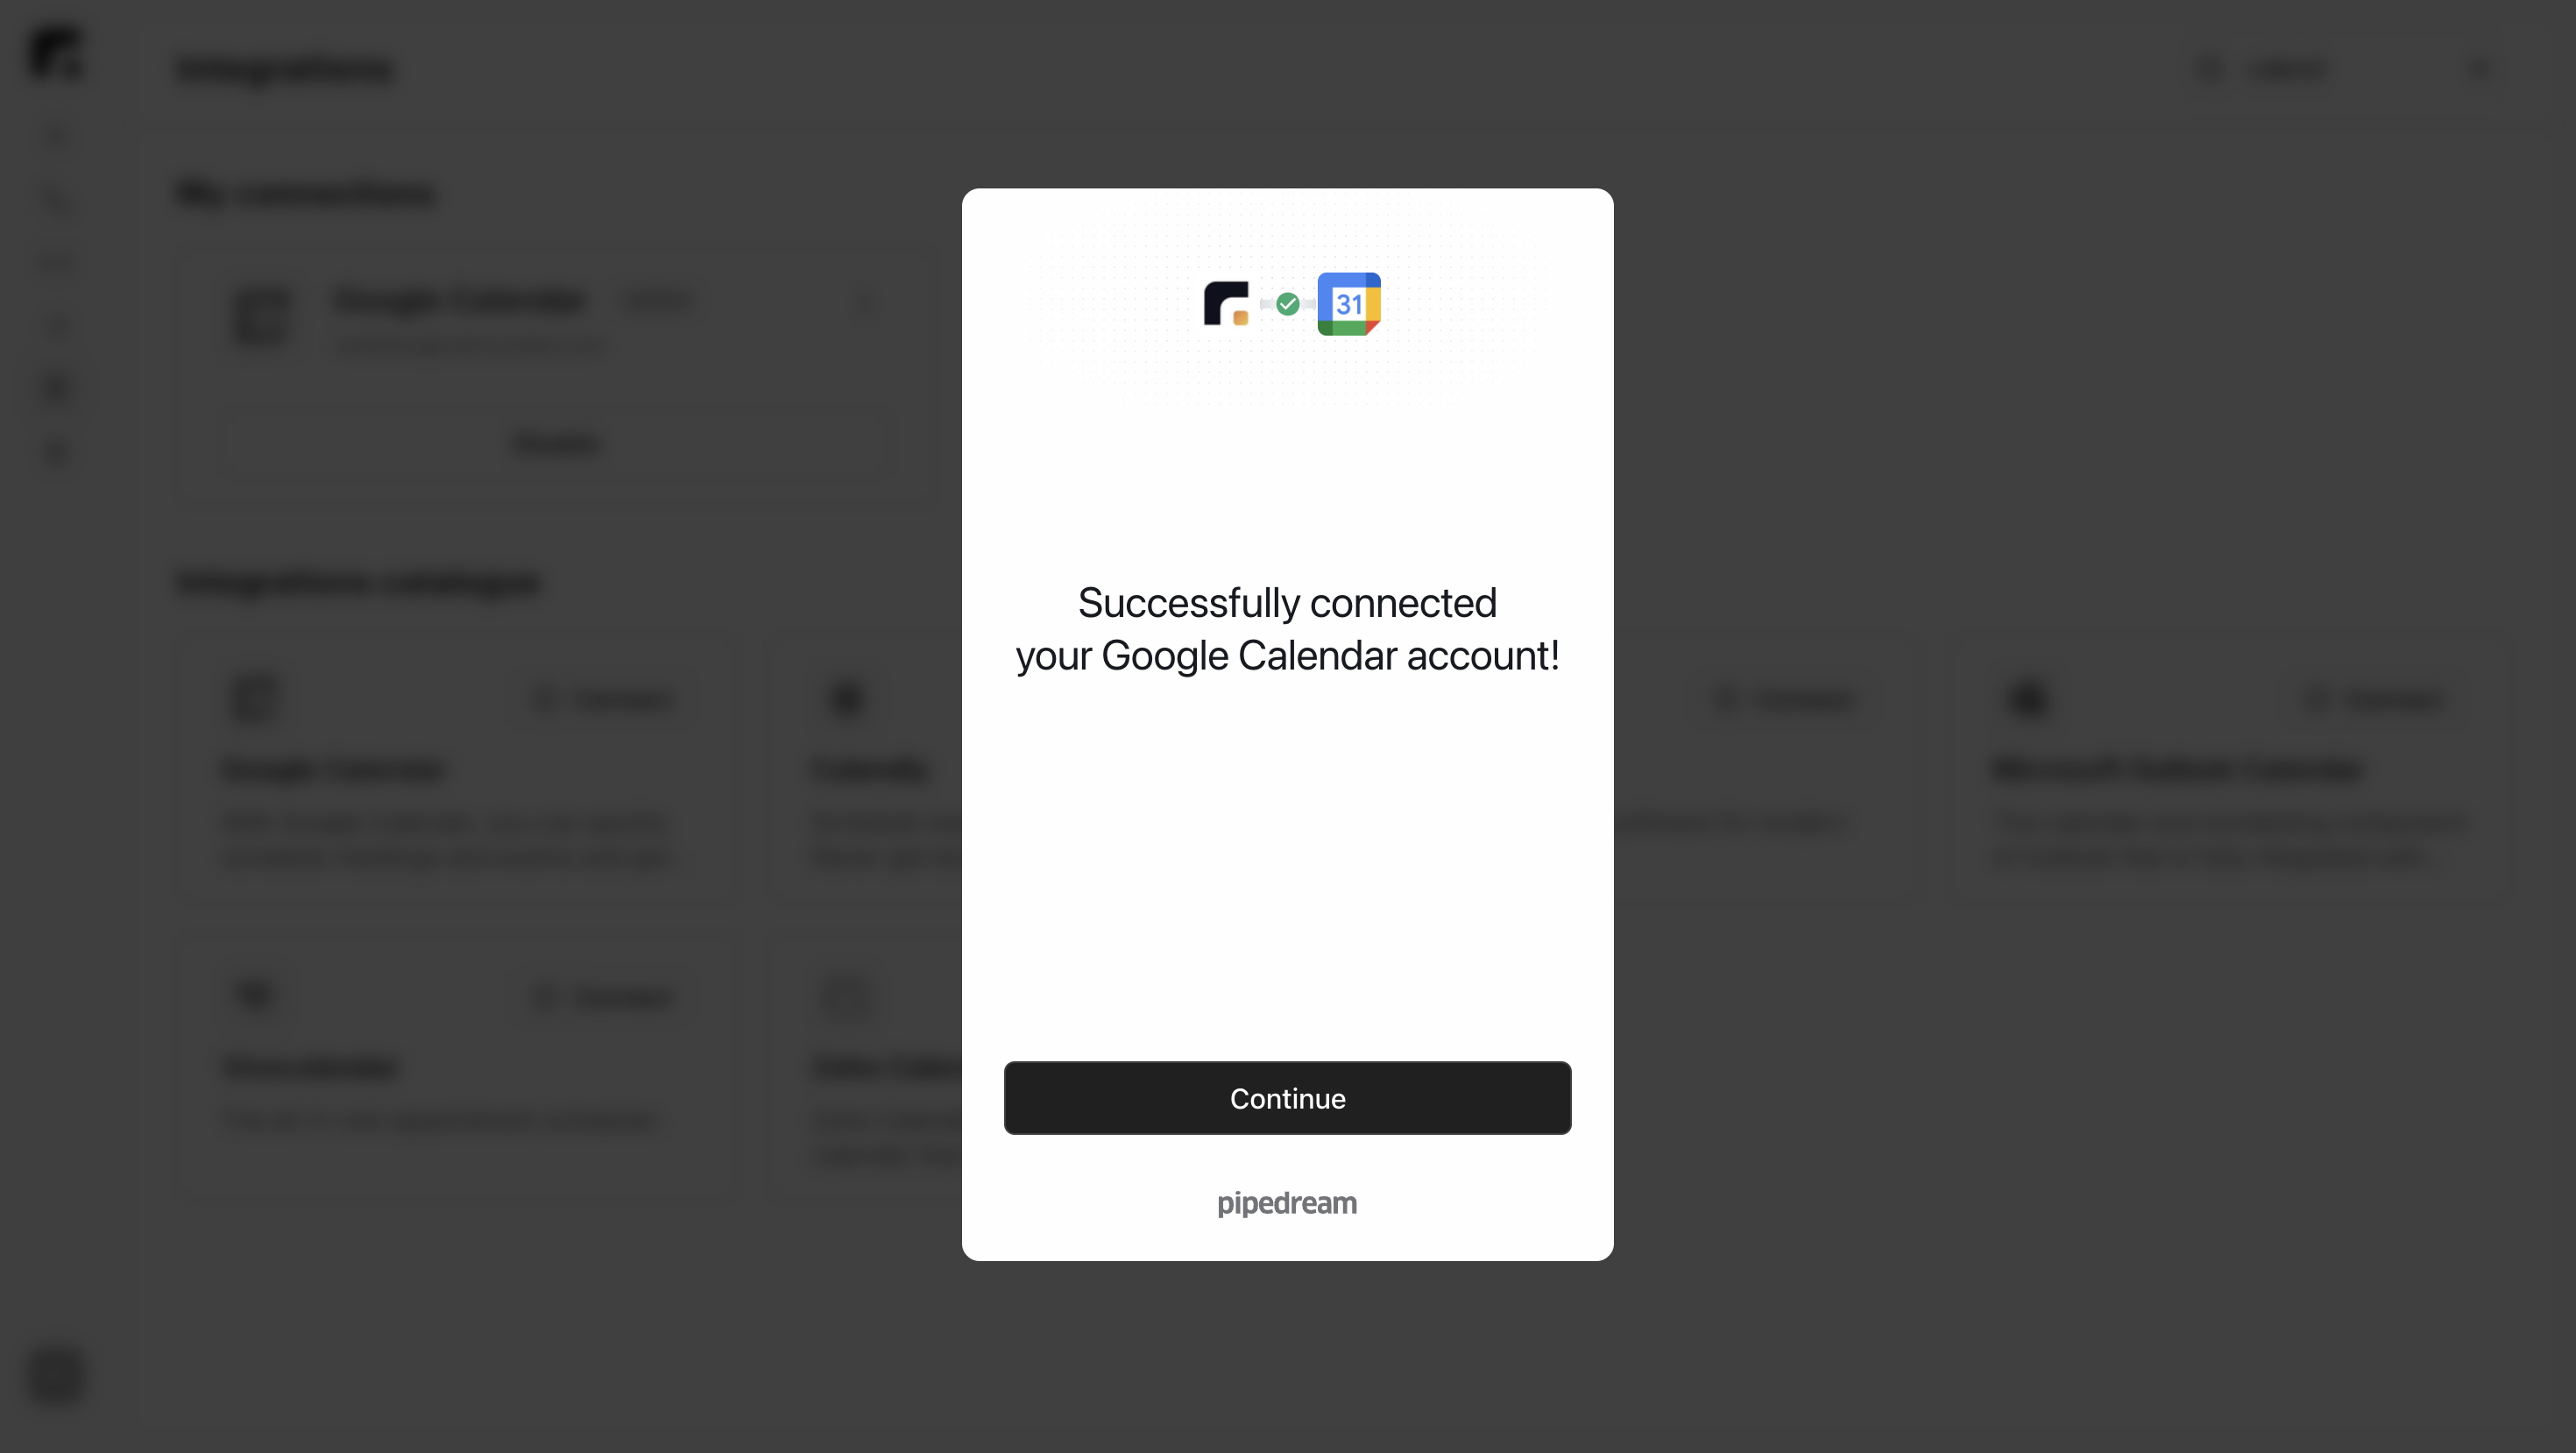
* The application now appears in **My Connections** with the status **Active**.
***
## 2. Authorising via Pipedream
A pop-up window opens to securely authorise access to your third-party account.
### Steps
* Click **Continue**.
* Log in to the external service and authorise access.
* The application now appears in **My Connections** with the status **Active**.
 ***
## 3. Adding the Integration to an Agent
Once your account is connected, you can use it inside your agents.
### Steps
1. Open the **Agents** tab.
2. Select the agent in which you want to add the integration.
3. Click the relevant **task** to open its settings.
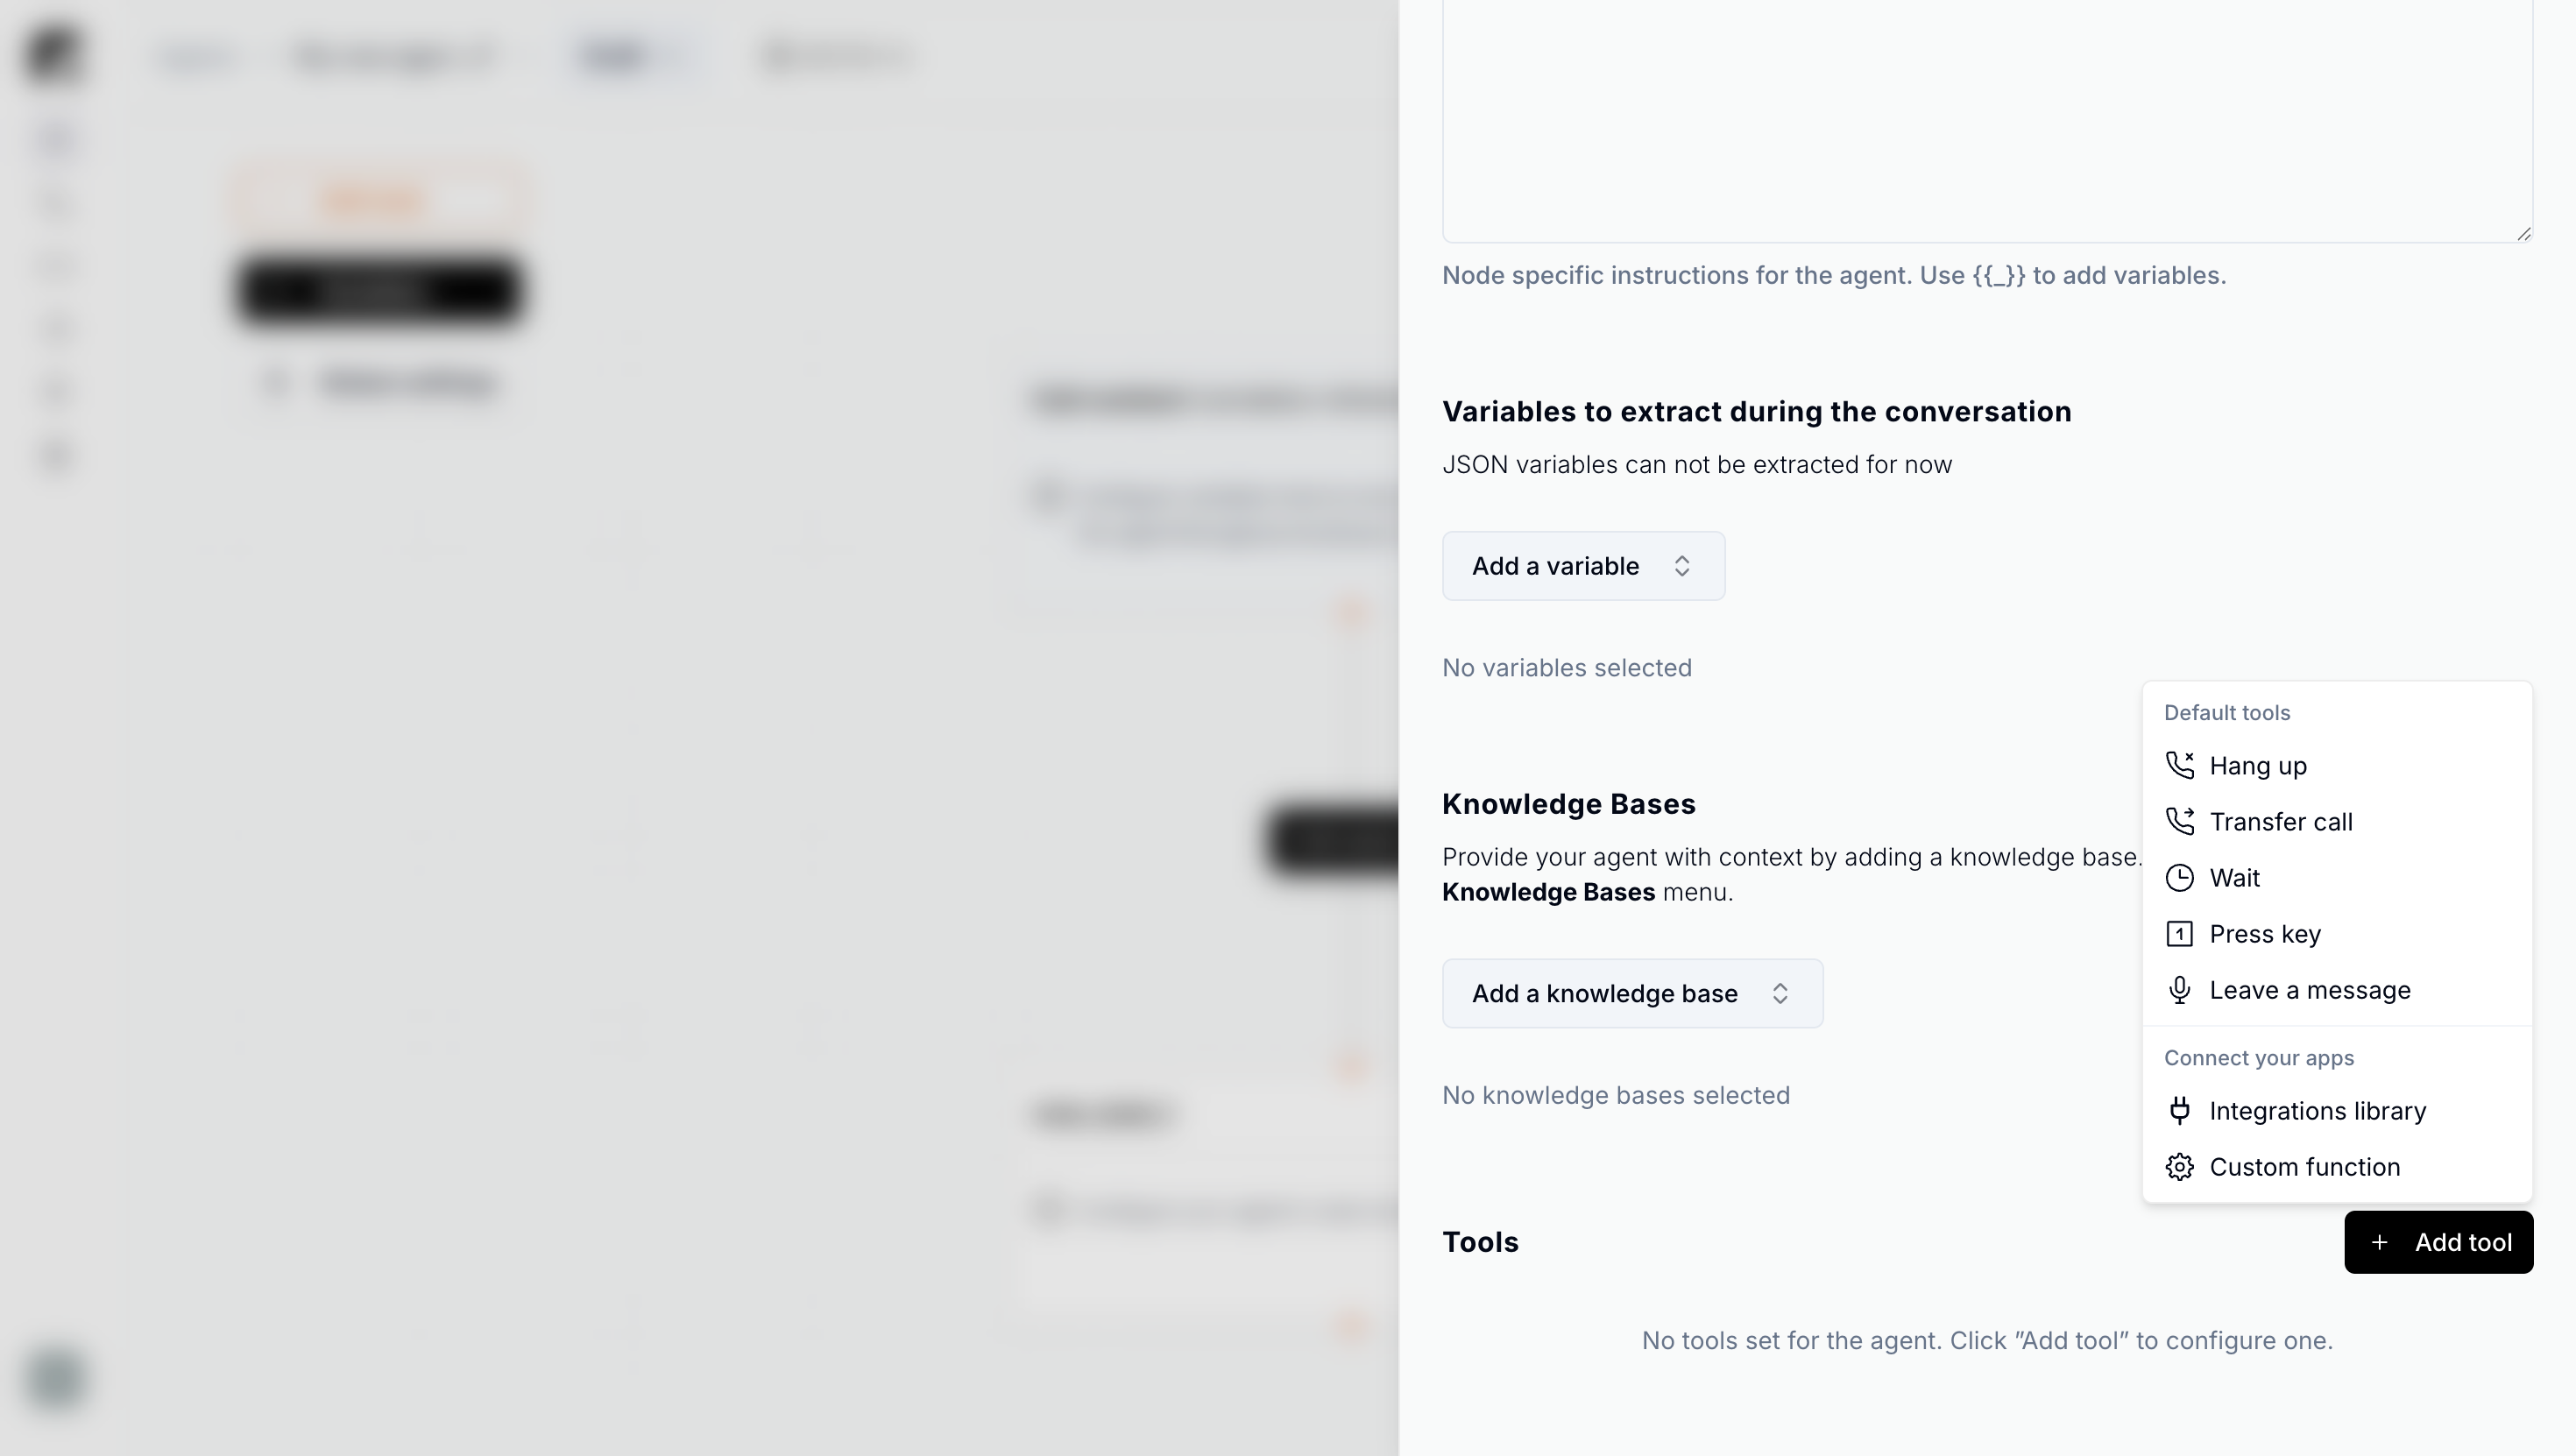
4. Scroll to the bottom and click **+ Add tool**.
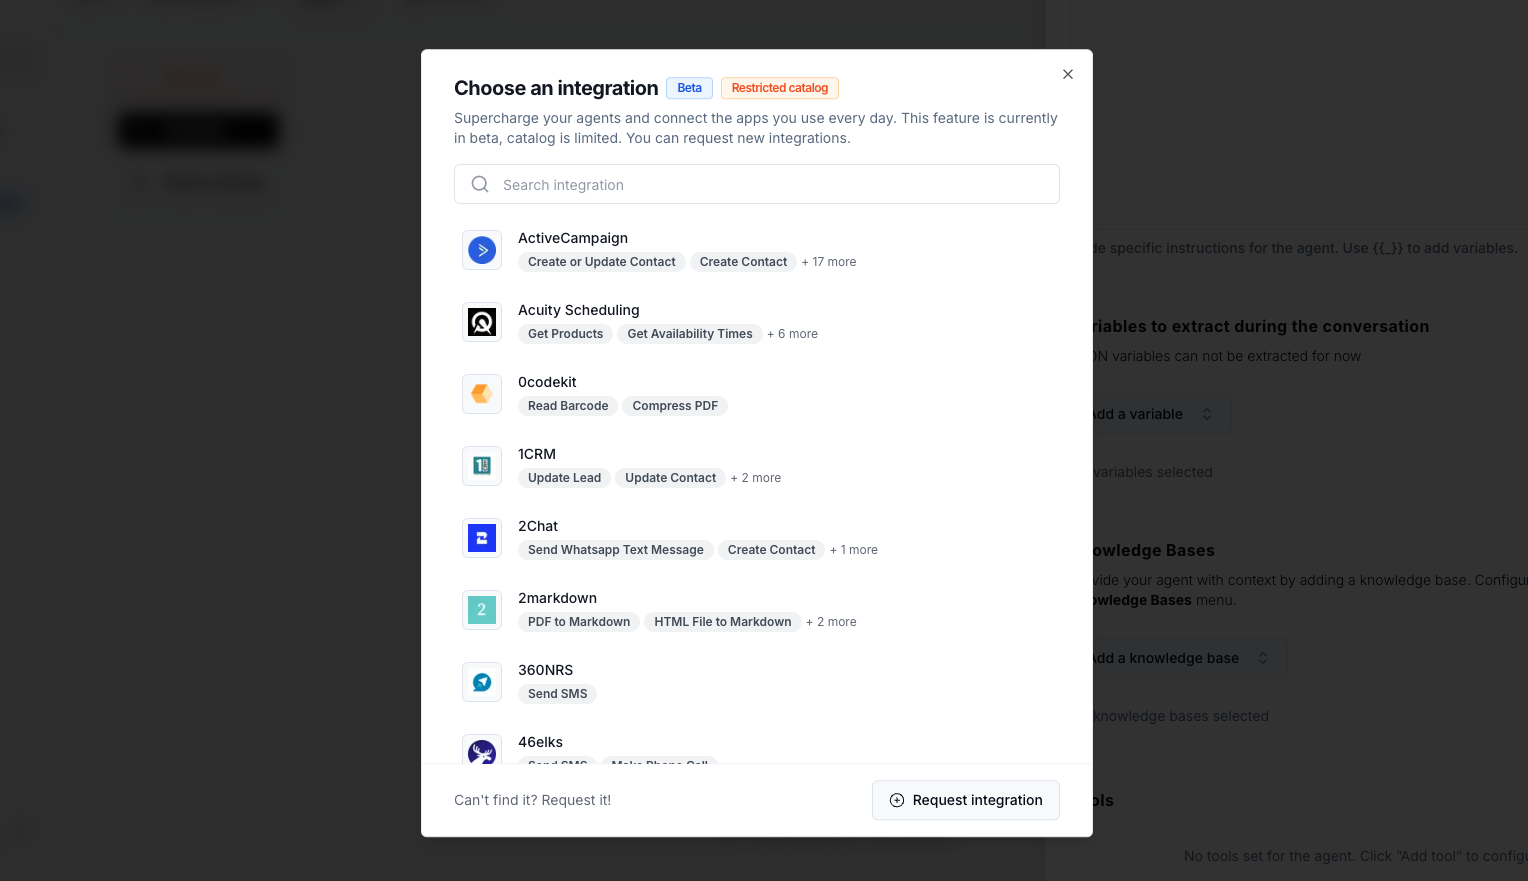
5. In the window that appears, click **Integrations Catalog**.
6. Select the application you have connected.
***
## 3. Adding the Integration to an Agent
Once your account is connected, you can use it inside your agents.
### Steps
1. Open the **Agents** tab.
2. Select the agent in which you want to add the integration.
3. Click the relevant **task** to open its settings.
4. Scroll to the bottom and click **+ Add tool**.
5. In the window that appears, click **Integrations Catalog**.
6. Select the application you have connected.
 ***
## 4. Configuring the Integration
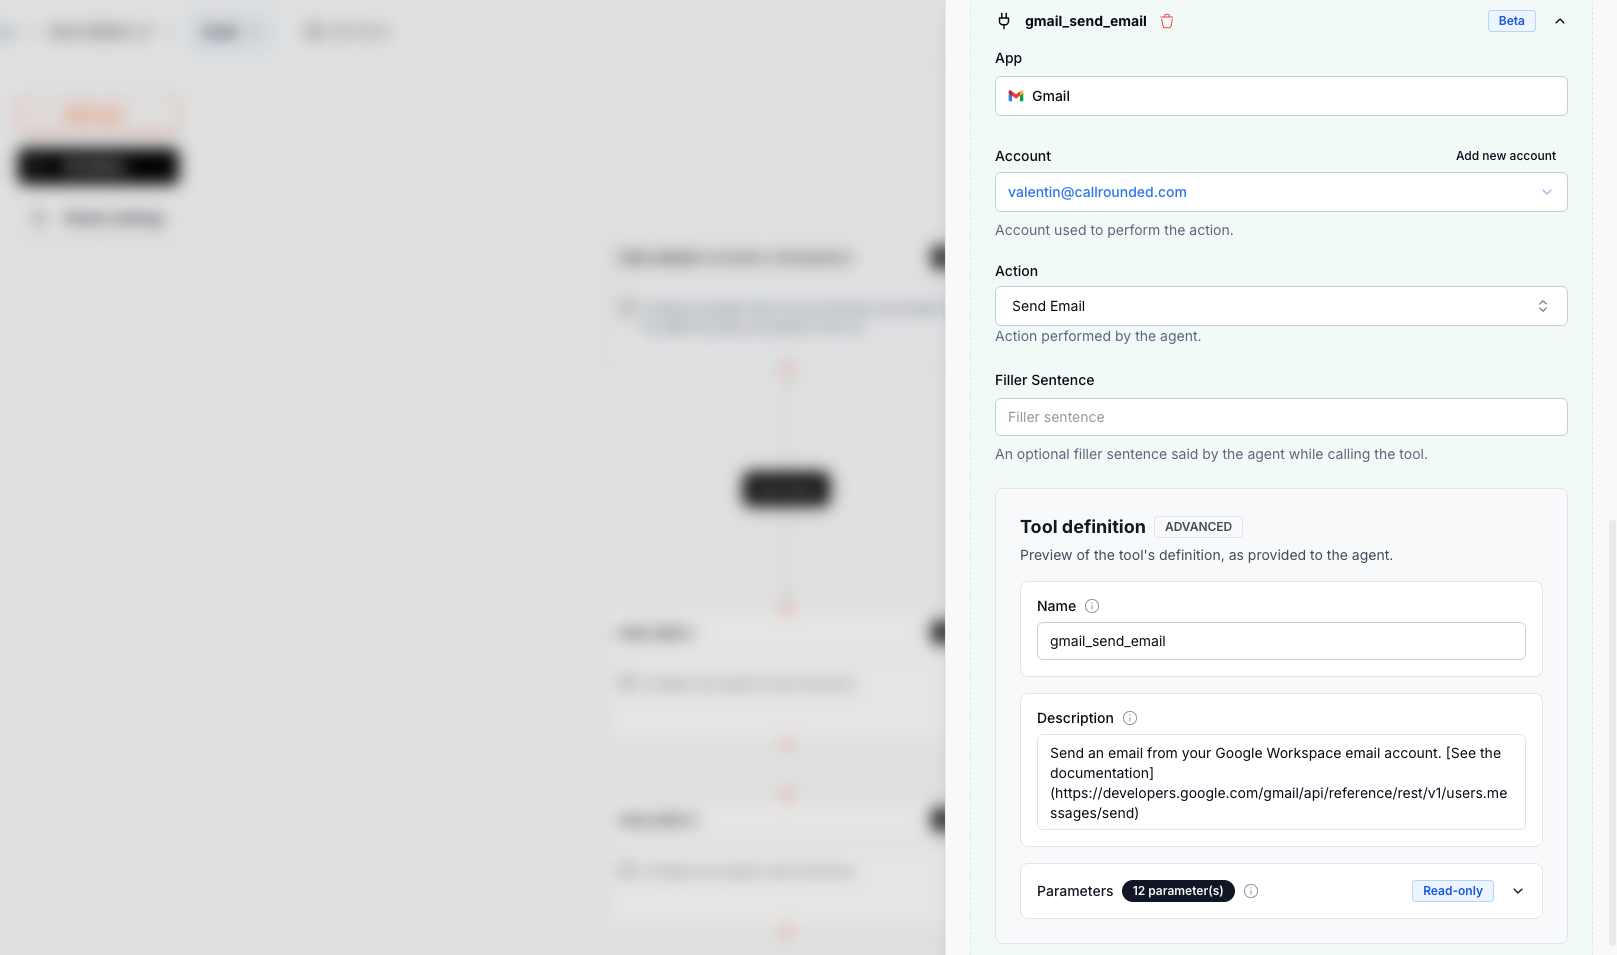
After selecting the application, a configuration form appears. Below is a detailed description of each field and best practices for writing your instructions.
***
## 4. Configuring the Integration
After selecting the application, a configuration form appears. Below is a detailed description of each field and best practices for writing your instructions.
 ### App
* **What it is:** The name of the selected application. This field is automatically populated.
### Account
* **What it is:** The connected account that will be used for the action. If you have several accounts, select the one that corresponds to this integration.
### Action
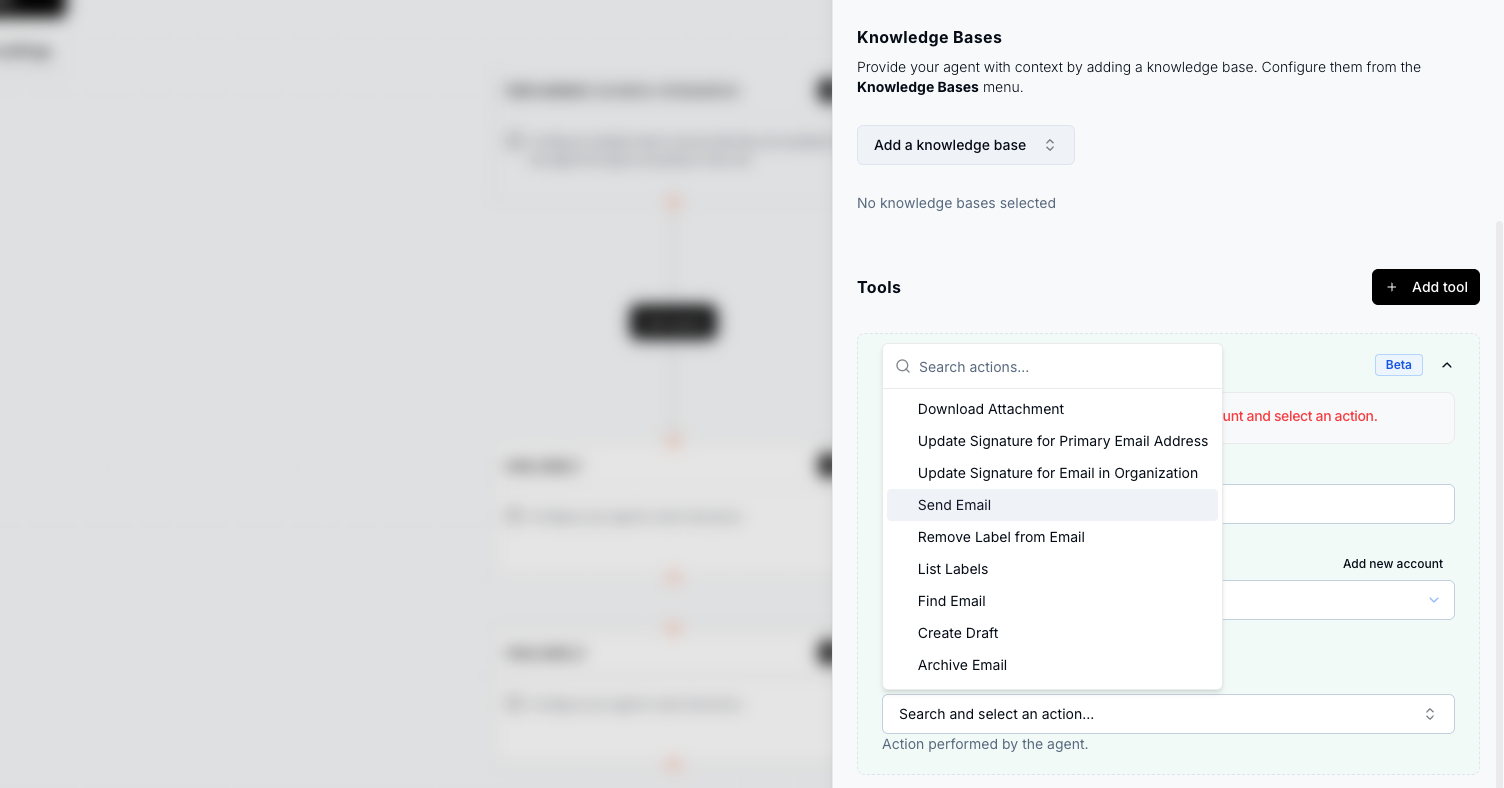
* **What it is:** The operation the agent will perform.
* **Common examples:** `Add Quick Event` (Google Calendar), `Send Message` (Slack, Telegram).
* **Tip:** Choose the simplest action if you are starting out.
### App
* **What it is:** The name of the selected application. This field is automatically populated.
### Account
* **What it is:** The connected account that will be used for the action. If you have several accounts, select the one that corresponds to this integration.
### Action
* **What it is:** The operation the agent will perform.
* **Common examples:** `Add Quick Event` (Google Calendar), `Send Message` (Slack, Telegram).
* **Tip:** Choose the simplest action if you are starting out.
 ### Filler Sentence
* **What it is:** The sentence spoken by the agent while the action is processing.
* **Examples:** "One moment, I am preparing your reservation." • "I am sending your message, please hold on."
### Tool Definition: Name
* **What it is:** The internal, technical name of the tool.
* **Recommendations:** Use a short, lower-case name without spaces – e.g. `send_text_message_or_reply`, `book_calendar_event`.
### Tool Definition: Description
*This is the most important field.* The description acts as the **guiding prompt** the agent will follow word-for-word to prepare and execute the action.
#### Writing Recommendations
Be precise and actionable. Always include:
* Default values (duration, title, channel, identifier, …)
* Mandatory fields
* Verifications or confirmations
* What to do if information is missing
##### Detailed Description Examples
**Slack**
```md theme={null}
If the user wants to send a message, post it in the #support channel.
The message must include:
- the user's first name
- the content of the request
If no channel is specified, default to #support.
Before sending, repeat the message to the user for confirmation.
```
**Telegram**
```md theme={null}
If the user wants to send a Telegram notification, post a message in the group with chat_id -123456789.
The message must include:
- the client's name
- the phone number
- the call date
If the user specifies another chat_id, use it instead.
Before sending, repeat the message to the user for confirmation.
```
**Google Calendar**
```md theme={null}
If the user requests an appointment, create an event in the main calendar.
The title should be "Confirmed Appointment".
The default duration is 1 hour.
Before creating it, ask the user to confirm the date and time.
If no duration is specified, use 1 hour.
```
In the description, always explicitly mention the channel or chat\_id and any default values.
### Tool Definition: Parameters
* **What it is:** Parameters provided by the agent to execute the action.
Some parameters of type `enum` require the agent to first retrieve the list of possible values. This is done using a special tool named `CONFIGURE_COMPONENT`, automatically added to the agent's context. When necessary, you can instruct the agent to call the `CONFIGURE_COMPONENT` tool to obtain the list of valid parameter values before executing the action.
***
## 5. Complete Configuration Example (Telegram)
Here is a concrete example of a fully configured **Telegram** integration:
* **App:** Telegram
* **Account:** Your connected Telegram account
* **Action:** Send Message
* **Filler Sentence:** One moment, I am sending the notification.
* **Tool Definition Name:** `send_text_message_or_reply`
* **Tool Definition Description:**
```md theme={null}
If the user wants to send a Telegram notification, post a message in the group with chat_id -123456789.
The message must include:
- the client's name
- the phone number
If the user specifies another chat_id, use it.
Before sending, repeat the message to the user for confirmation.
```
***
## 6. Testing the Integration
Before going live:
1. Launch a test call.
2. Verify that:
* The action executes properly.
* Default values work as expected.
* Confirmations are correctly handled.
***
## Best Practices
* Always be explicit in the description.
* Mention the channel or group identifier.
* Indicate default values.
* Request confirmation before executing any action.
* Test multiple scenarios before moving to production.
### Filler Sentence
* **What it is:** The sentence spoken by the agent while the action is processing.
* **Examples:** "One moment, I am preparing your reservation." • "I am sending your message, please hold on."
### Tool Definition: Name
* **What it is:** The internal, technical name of the tool.
* **Recommendations:** Use a short, lower-case name without spaces – e.g. `send_text_message_or_reply`, `book_calendar_event`.
### Tool Definition: Description
*This is the most important field.* The description acts as the **guiding prompt** the agent will follow word-for-word to prepare and execute the action.
#### Writing Recommendations
Be precise and actionable. Always include:
* Default values (duration, title, channel, identifier, …)
* Mandatory fields
* Verifications or confirmations
* What to do if information is missing
##### Detailed Description Examples
**Slack**
```md theme={null}
If the user wants to send a message, post it in the #support channel.
The message must include:
- the user's first name
- the content of the request
If no channel is specified, default to #support.
Before sending, repeat the message to the user for confirmation.
```
**Telegram**
```md theme={null}
If the user wants to send a Telegram notification, post a message in the group with chat_id -123456789.
The message must include:
- the client's name
- the phone number
- the call date
If the user specifies another chat_id, use it instead.
Before sending, repeat the message to the user for confirmation.
```
**Google Calendar**
```md theme={null}
If the user requests an appointment, create an event in the main calendar.
The title should be "Confirmed Appointment".
The default duration is 1 hour.
Before creating it, ask the user to confirm the date and time.
If no duration is specified, use 1 hour.
```
In the description, always explicitly mention the channel or chat\_id and any default values.
### Tool Definition: Parameters
* **What it is:** Parameters provided by the agent to execute the action.
Some parameters of type `enum` require the agent to first retrieve the list of possible values. This is done using a special tool named `CONFIGURE_COMPONENT`, automatically added to the agent's context. When necessary, you can instruct the agent to call the `CONFIGURE_COMPONENT` tool to obtain the list of valid parameter values before executing the action.
***
## 5. Complete Configuration Example (Telegram)
Here is a concrete example of a fully configured **Telegram** integration:
* **App:** Telegram
* **Account:** Your connected Telegram account
* **Action:** Send Message
* **Filler Sentence:** One moment, I am sending the notification.
* **Tool Definition Name:** `send_text_message_or_reply`
* **Tool Definition Description:**
```md theme={null}
If the user wants to send a Telegram notification, post a message in the group with chat_id -123456789.
The message must include:
- the client's name
- the phone number
If the user specifies another chat_id, use it.
Before sending, repeat the message to the user for confirmation.
```
***
## 6. Testing the Integration
Before going live:
1. Launch a test call.
2. Verify that:
* The action executes properly.
* Default values work as expected.
* Confirmations are correctly handled.
***
## Best Practices
* Always be explicit in the description.
* Mention the channel or group identifier.
* Indicate default values.
* Request confirmation before executing any action.
* Test multiple scenarios before moving to production.